

In this article, you will learn how to connect Micro:bit + Newbit Arcade Shield to the computer and write programs on both MakeCode Arcade to make your own games.
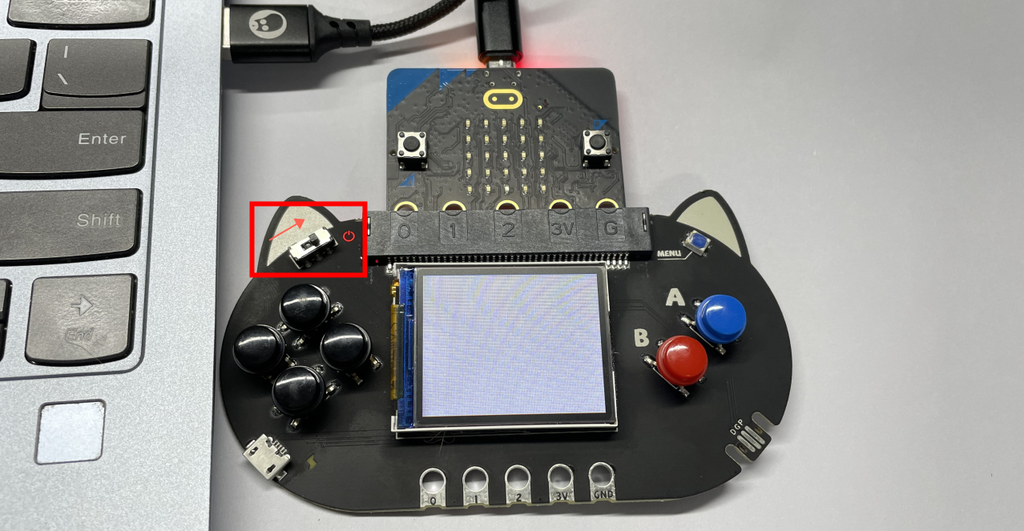
Hardware Connection
Insert Micro:bit V2 into the expansion board, connect the microUSB to Micro:bit V2.
|
Programming Editor
| Newbit Arcade Shield game programming editor address: https://arcade.makecode.com |
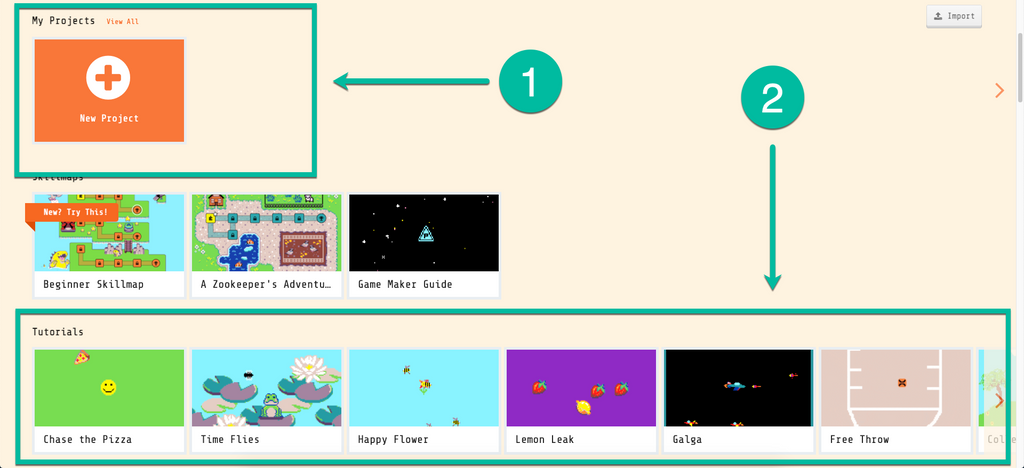
The home page interface
1. Click the "New Project" to create a new project to program.
2. The contents in the second frame below are tutorials offered by the platform and works shared in the community, you can try some of these if you are a beginner.
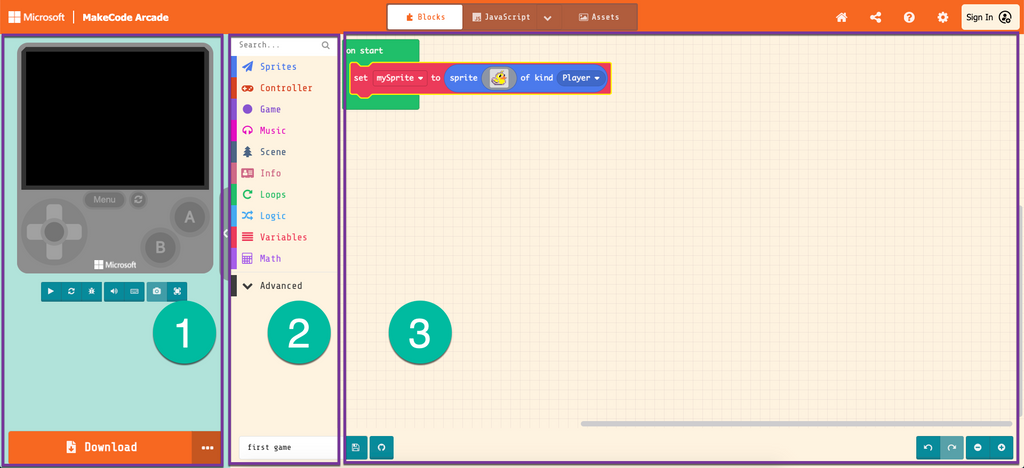
Here is a simple programming interface introduction.
1. Online simulator: Here you can see the simulated running result of your program.
2. Block toolbox: We can drag codes from here to program.
3. Programming workplace: We can put different codes that are dragged from the block toolbox together to build the looks of our sprites, the background, logic, etc.
Quick Start
We can get the result shown in the video by following the steps below: make the bird jump up, left, and right, and build the physical relationship between the bird and the map.
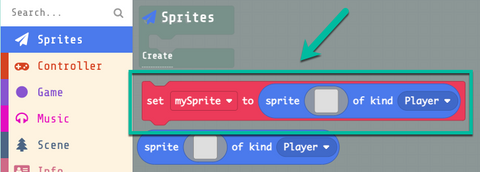
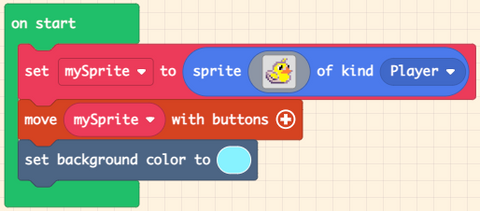
■ Create a sprite
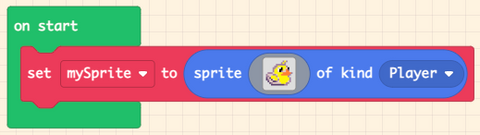
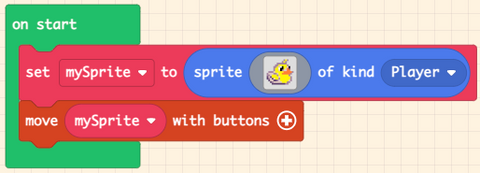
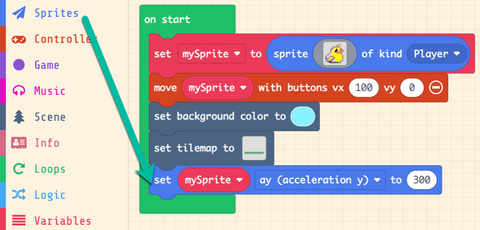
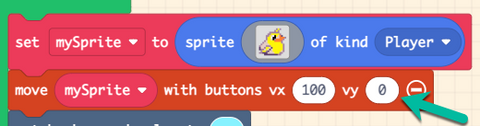
1. Choose or design your own sprite. Use the block shown below to create a sprite, and put the block in the on start block, and choose a look from the gallery (or you can draw your own look of the sprite).
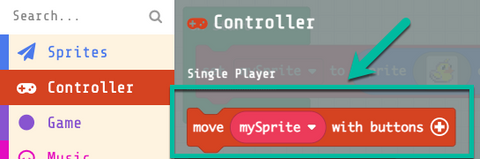
2. Use buttons to control the sprite as shown below. Now you can control the sprite to move in the simulator.
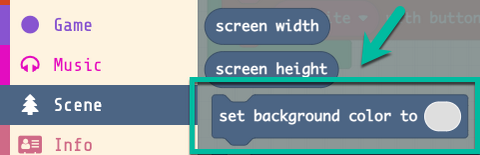
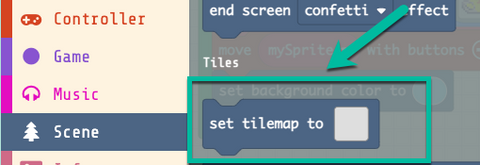
3. Add a background to the game. Now let's simply change the background color to brighten up the scene!
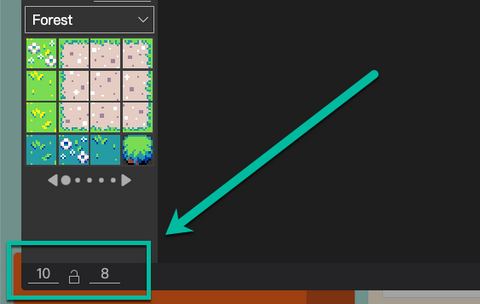
| The 10:8 here represents that 10 and 8 tiles should be put on the length and the width of the screen respectively. Since one tile equals 16 pixels by default, the 10:8 we set now covers the screen of the simulator (Meowbit screen) just right. If the numbers are set higher than it, the map would overflow to the right and the bottom with the upper left corner as the origin, which will be explained in future lessons. |
5. We have created the sprite and the map, so let's see the result: we can run this program in the simulator and control the bird with the D-pad freely.
■ Create a sprite
We have created a simple game above, including the sprite, the scene, and the background color, so now, let's make it alive! But how? It sounds impossible, but we can actually make it come to life by adding interactions in the game. For example, we can make the bird "chirps" when it touches the tree.
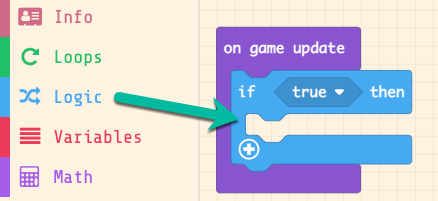
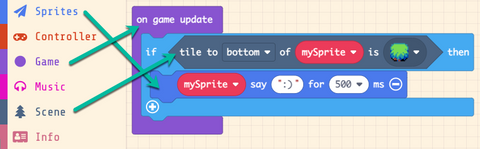
1. Interaction takes place all the time, whether in games or in life. We can use the block on game update to perform the constant interaction in the game: when the game is still running, the content in this block will be refreshed and executed at a subtle speed.

2. The basis of interaction is conditional statements and execution. Let's take the situation that the bird chirps when it touches a tree as an example, "whether it touches a tree" is a conditional statement, then "it chirps when it touches a tree" is the execution of the statement. Here we can drag out the if true then block from the Logic category.
3. Write the program as the figure below using the right blocks, then run in the simulator. The text face ":)" will show up when the bird touches the tree.
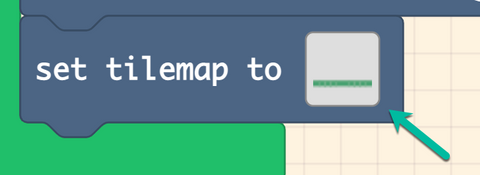
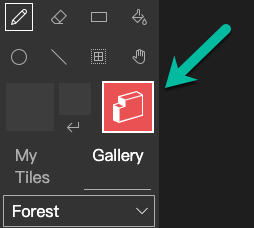
4. In real life, when we walk in the street, and there is a huge rock in front of us, we cannot just go across it, instead, it would be an obstacle preventing us from moving forward. So to make the game more realistic, we need to add the "Wall" feature to the tilemap. First let's go back to the set tilemap to block, enter the editor and click the "draw walls" button.
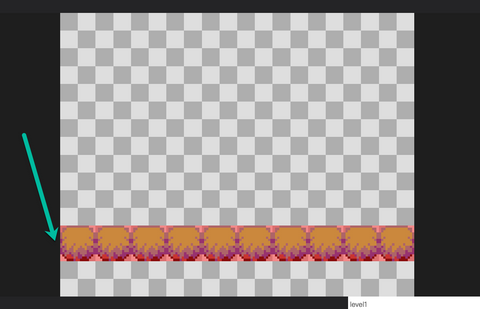
5. Then draw it on the tiles that the bird should not go across to change them into "walls". The sprite cannot go across the tiles that become red.
In line with physics
Gravity is also an extremely realistic factor in our life, so let's try to put it in our game.
1. Let's assume that the scene is the sky, and we need to add gravity to the bird. The acceleration of free fall of birds normally should be 9.8m/s², but mapping 1 meter in pixels on this screen looks too slow, so here we enlarge it by about 30 times and round it up.
|
We can see the bird keeps falling from the start, which looks like it free falling in real life. |
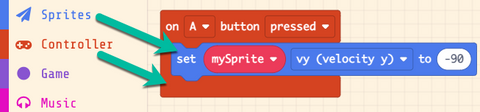
2. To avoid hitting the tree, the bird needs to flap its wings to fly.
Since we have never tested the instant vertical velocity of a real bird flapping its wings ready to fly, so we use the vertical velocity of a human to take off for simulation.
So we can get the instant velocity: v≈3m/s |
As we should enlarge it by 30 times, the instant velocity y of moving upward vertically is 90. Press A to make the bird flap its wings once.
Game Download
■ Instructions
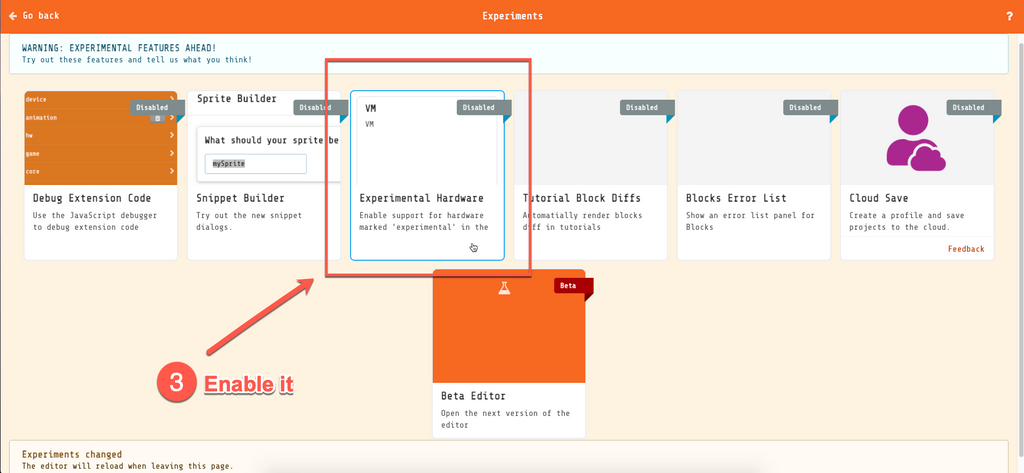
For MakeCode Arcade, Micro:bit V2 (nRF52833) is still in the testing phase, so we need to enable the experimental hardware in the setting page.
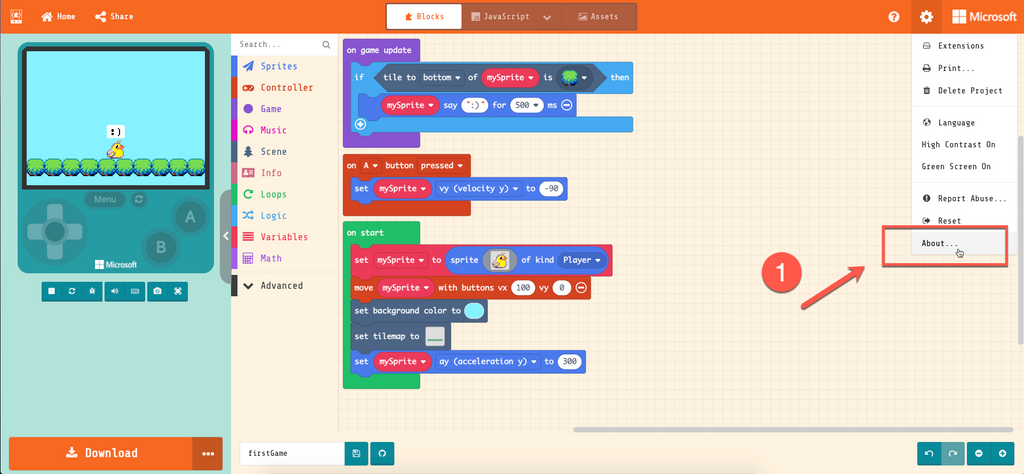
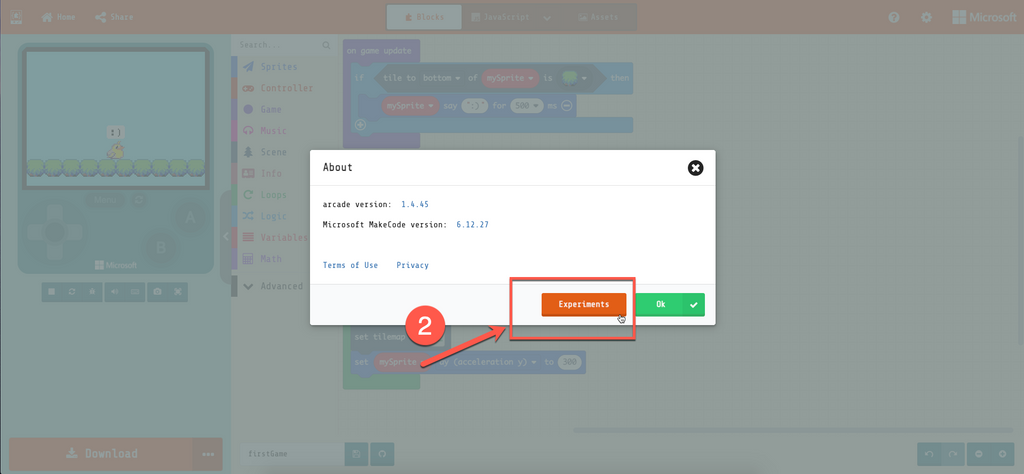
Make sure that the Experimental Hardware is "Enabled" (only need to set it once)
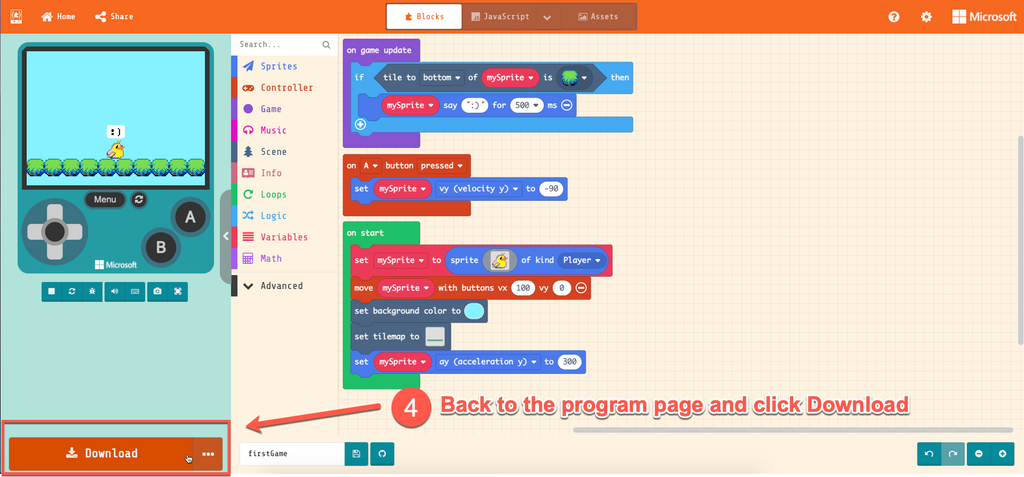
Then, let's go back to the programming page and click the Download in the bottom left corner, scroll down the pop-up windows of hardware and choose N3 at the bottom.
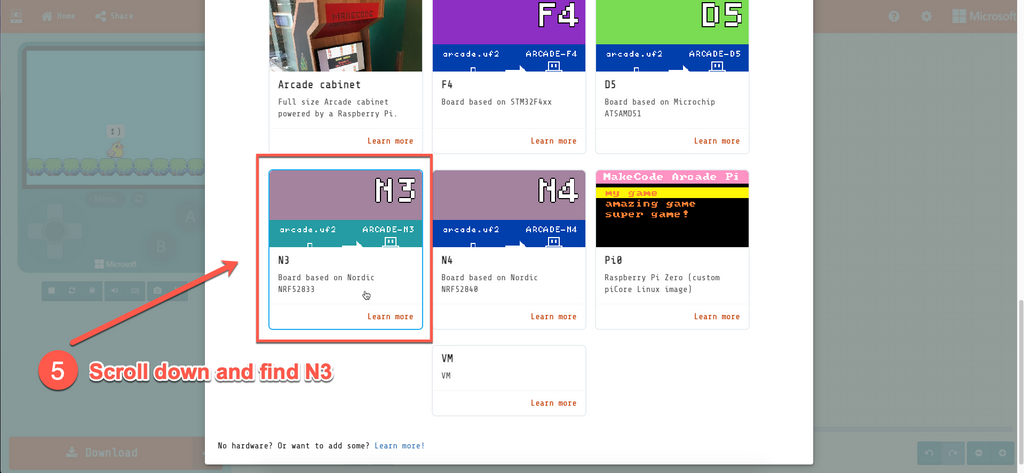
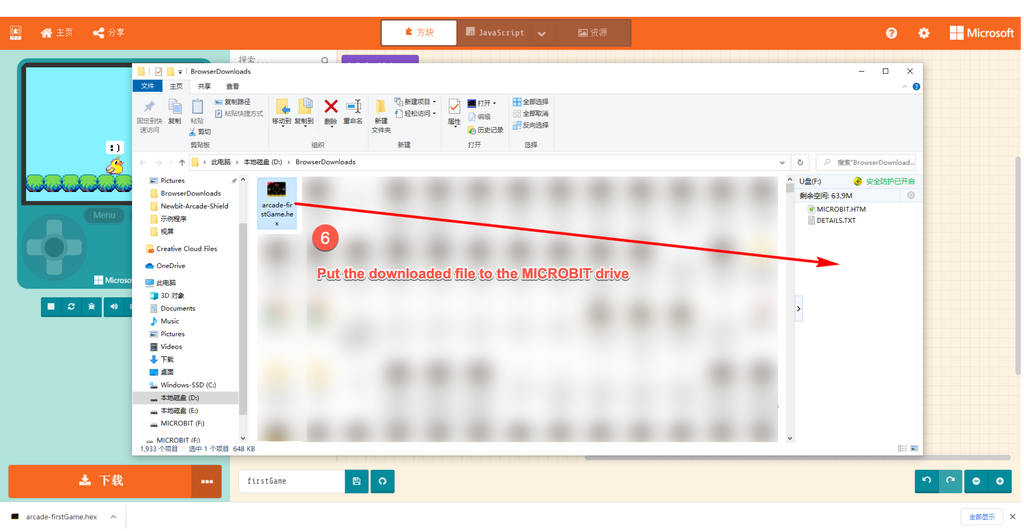
You will get a file with .hex format, drag it to the MICROBIT driver letter, then, you can run your game in the Micro:bit V2 + Newbit Arcade Shield.
Source file
Go to the project: https://makecode.com/_LdFRbMU08Jgt
If you have any question, please feel free to contact us at Discord, we will always be there to help.
KittenBot Team