

In this article, you will learn how to connect Micro:bit + Newbit Arcade Shield to the computer and write programs on both MakeCode and MakeCode Arcade to control your robot car remotely.
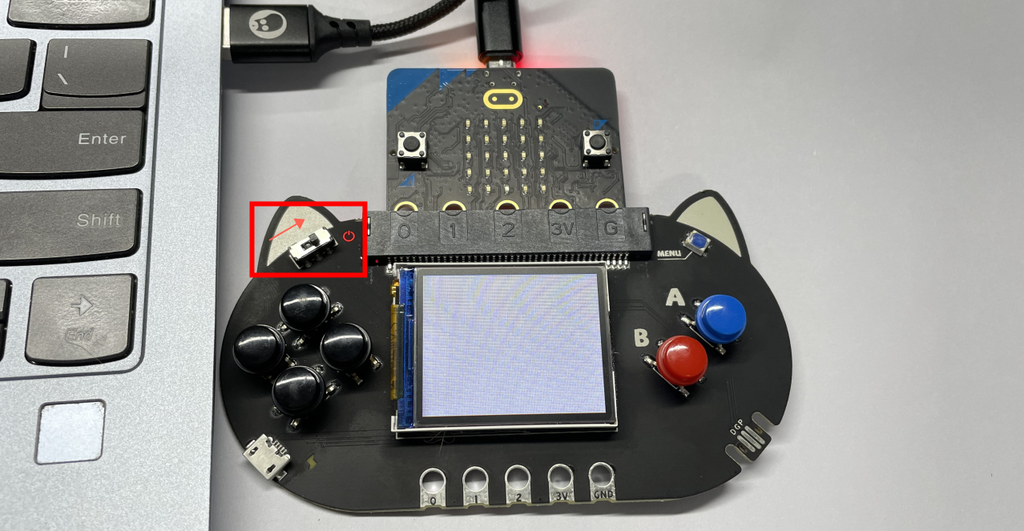
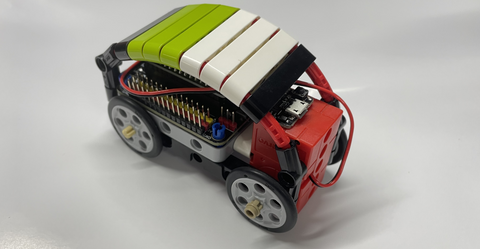
Hardware Connection
Insert Micro:bit V2 into the expansion board, connect the microUSB to Micro:bit V2.
|
Program Editor
|
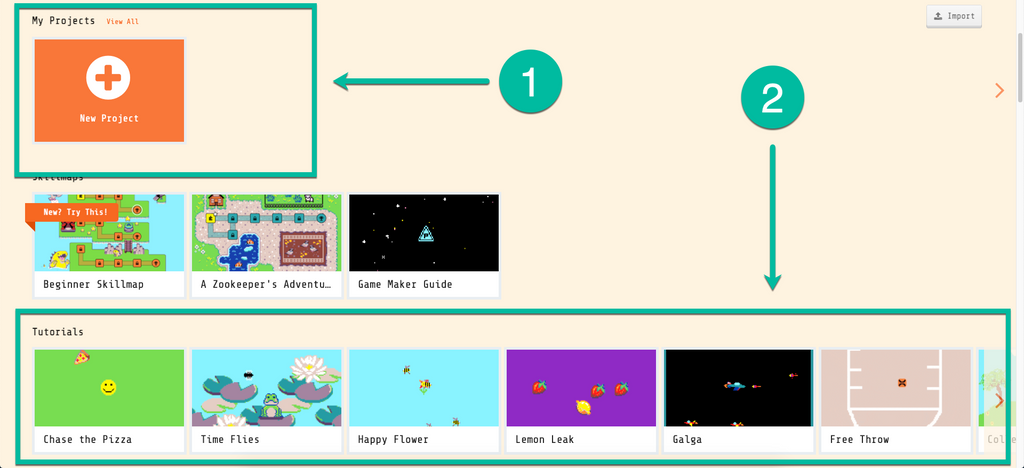
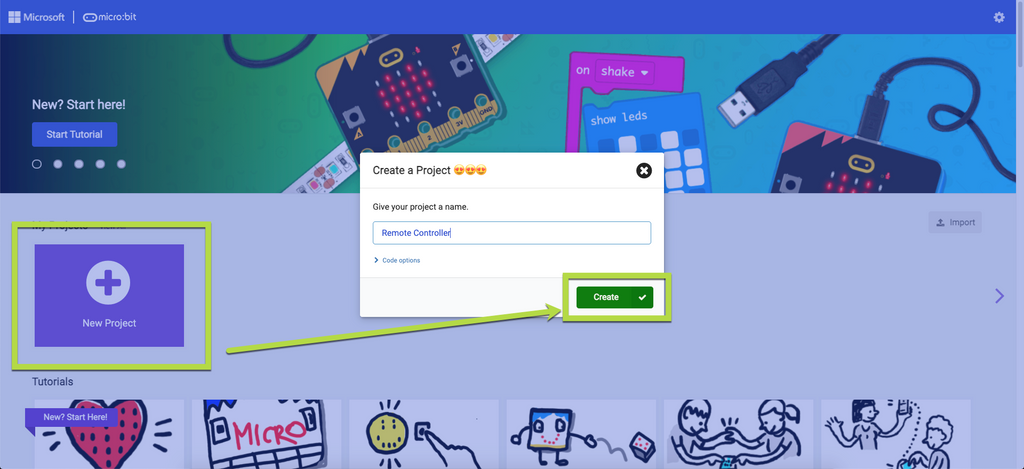
Newbit Arcade Shield game programming editor address: https://arcade.makecode.com |
The home page interface
1. Click the "New Project" to create a new project to program.2. The contents in the second frame below are tutorials offered by the platform and works shared in the community, you can try some of these if you are a beginner.
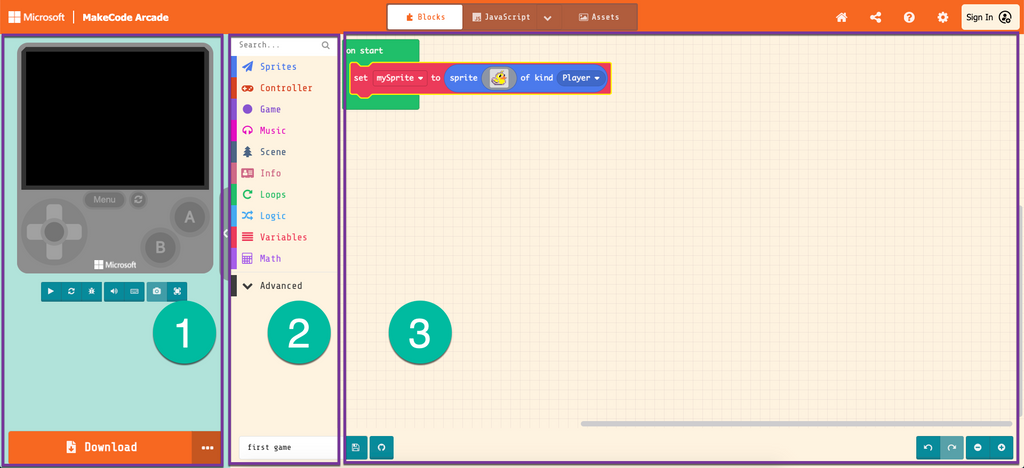
Here is a simple programming interface introduction.
1. Online simulator: Here you can see the simulated running result of your program.2. Block toolbox: We can drag codes from here to program.3. Programming workplace: We can put different codes that are dragged from the block toolbox together to build the looks of our sprites, the background, logic, etc.
Remote Control Vehicle
■ Result Display
Since it is only an example, so the object that is being controlled here is a single motor toy car. We here need to control the car to move forward and backward. The remote controller end should be programmed in MakeCode Arcade, and the car end in MakeCode.
■ Material Preparation
Following materials will be used:
- MicrobitV2 *1
- Newbit Arcade Shield *1
- Nanobit *1 (equal to Micro:bit)
- Nanobit Shield *1 (play the same role as the Robotbit expansion board)
- 2KG GeekServo *1 (other servos are fine too)
- Several Lego bricks
■ Car End Programming
|
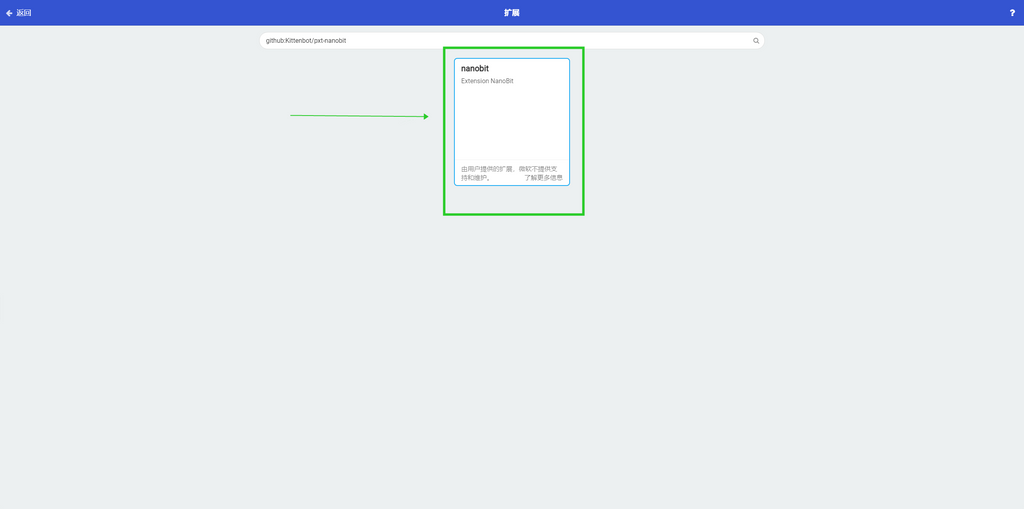
If you want to use Micro:bit + Robotbit to program the car, you can load the Robotbit extension (search in the extension section: Robotbit) |
Programming Editor
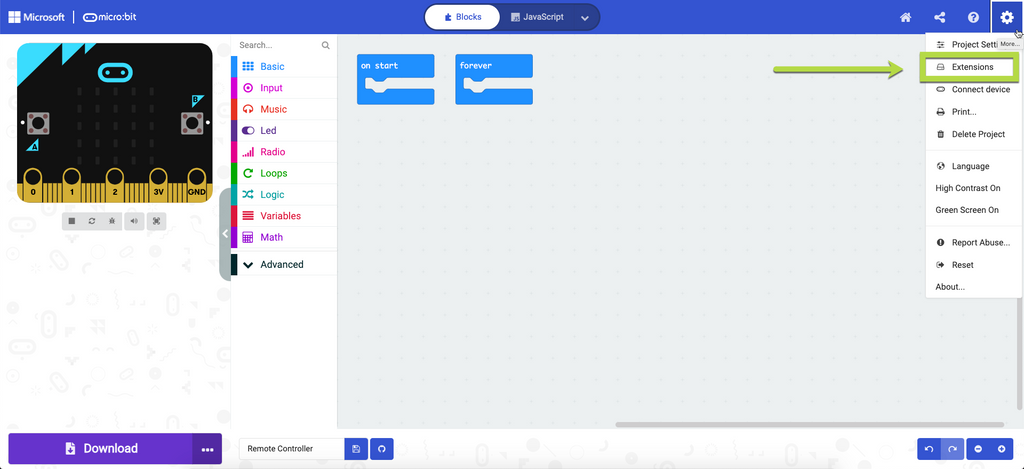
- Create a new project to start to program
Load the extension
The main control board of the car end in this project is Nanobit, so the expansion board should be equipped with Nanobit Shield. Hence here I would use the corresponding MakeCode extension. (Microbit users can change it into Robotbit extension)
Write the program
First let's analyze the car, here are the things that the car end needs to do
- Receive the signal (should be in the same channel with the console)
- Drive the motor to move (evaluate the data sent by the console, then calculate the velocity of the servo correspondingly)
Download the program
Make sure to use the MicroUSB data cable to connect to the main control board, then drag the downloaded file of .hex format to the driver letter named Nanobit (MICROBIT).

■ Remote Controller End Programming
|
Since the buttons on Mewbit Arcade Shield is not directly driven by the IO ports of Micro:bit V2, so it cannot be used in MakeCode. Here we need to go to the MakeCode Arcade editor to program.
|
Program Editor
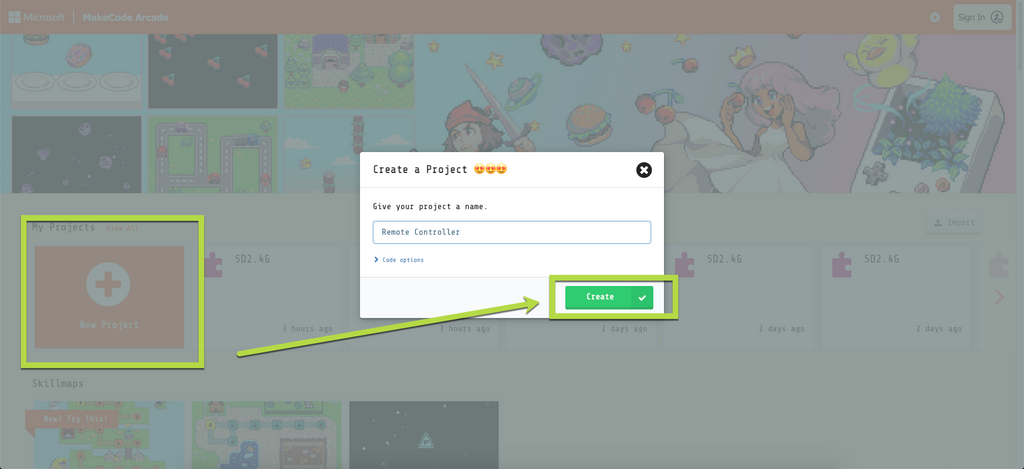
- Create a new project to start to program
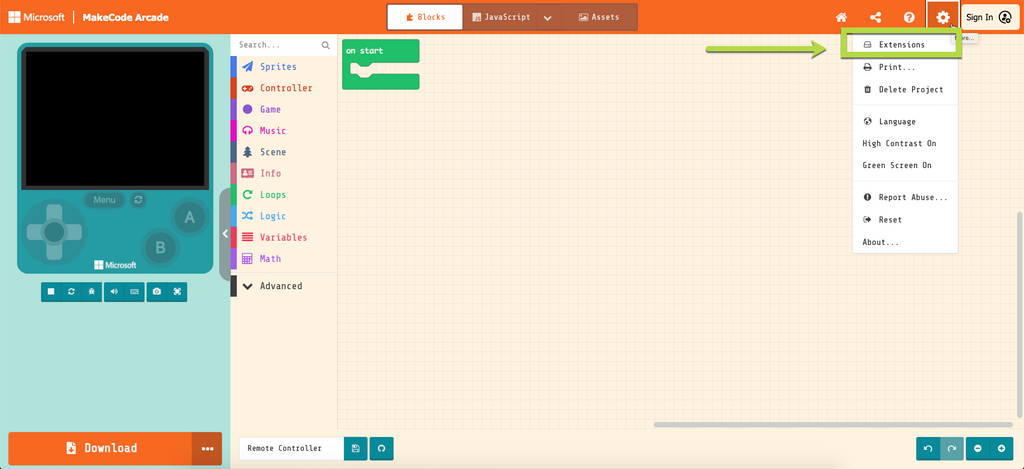
The wireless feature in this project is an additional extension in MakeCode Arcade, so we need to load this extension in Arcade first.
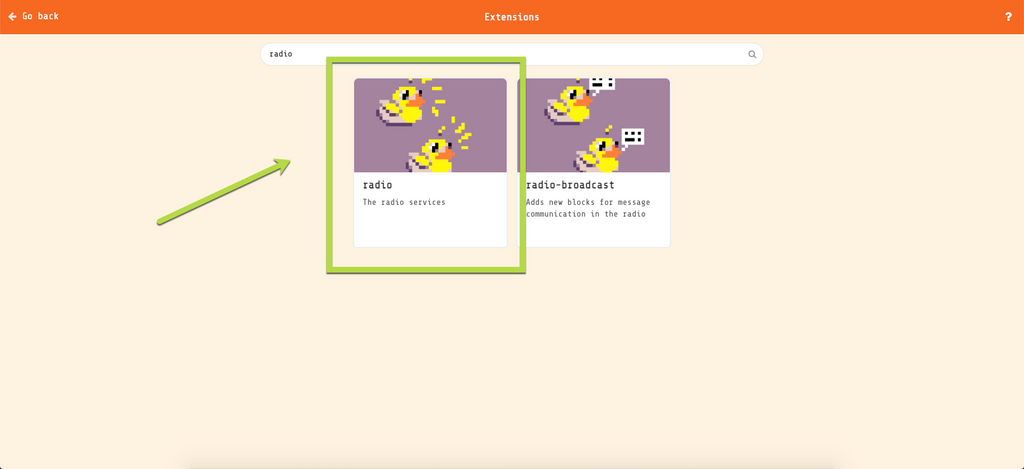
Search for "radio", choose the first extension.
Write the program
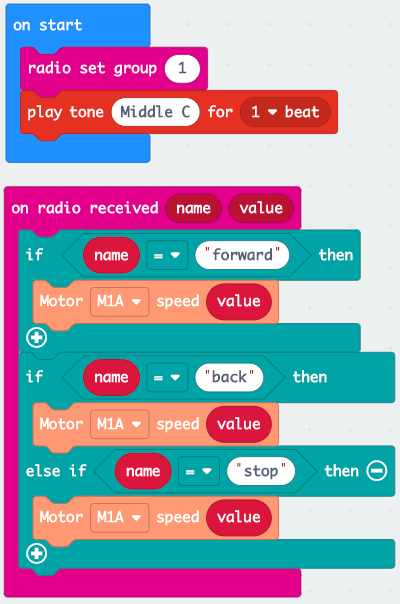
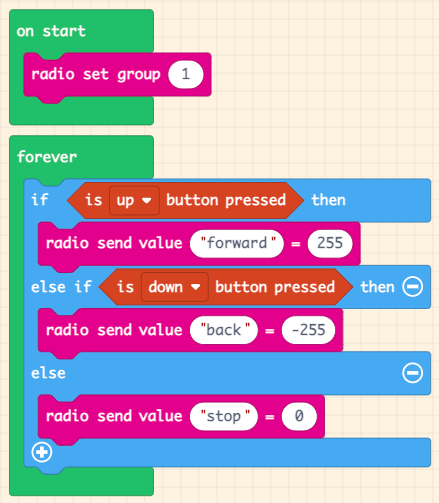
The main function of the console end is communication and sending control signals. We need to program to make the car move forward when pressing "up" button, move backward when pressing "down" button, stop when pressing nothing. We can write the program like shown in the figure below. (We do not need to use the key-value pair for the moving forward and backward at a fix velocity, but you can try is according to your own situations)
Download the program
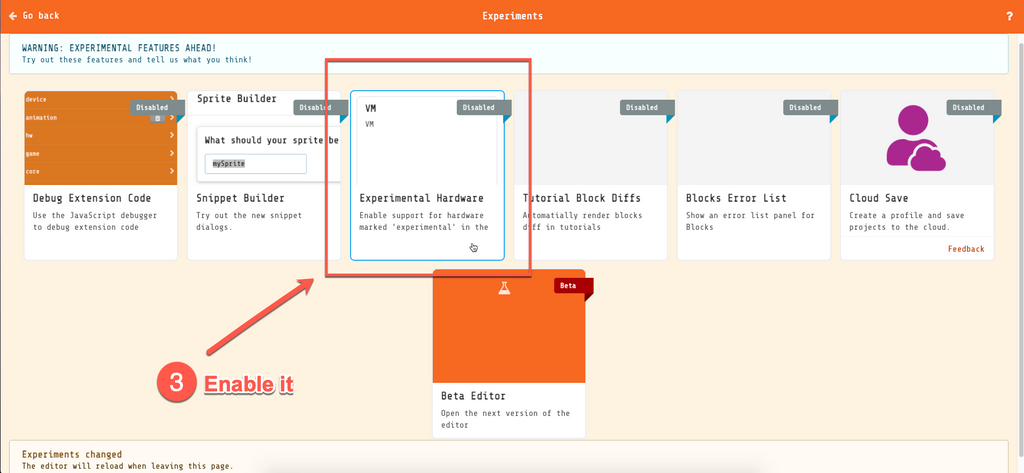
For MakeCode Arcade, Micro:bit V2 (nRF52833) is still in the testing phase, so we need to enable the experimental hardware in the setting page.
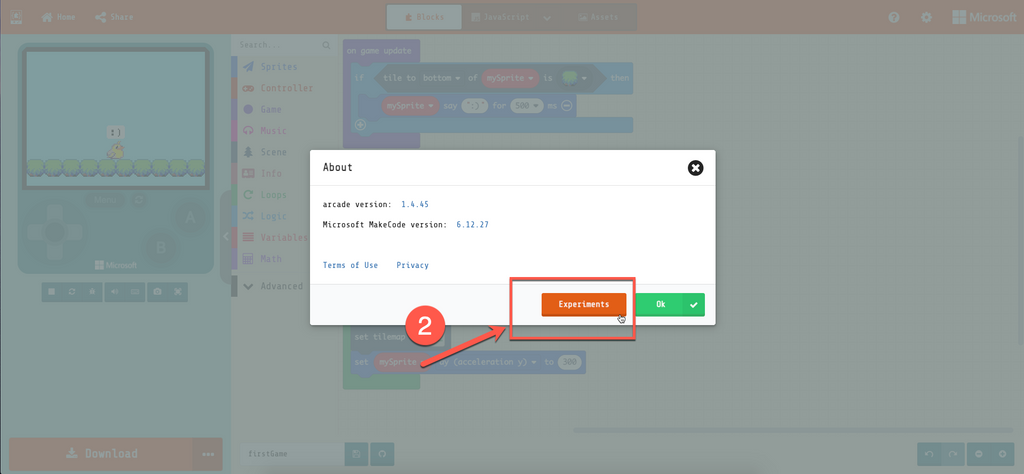
Make sure that the Experimental Hardware is "Enabled" (only need to set it once)
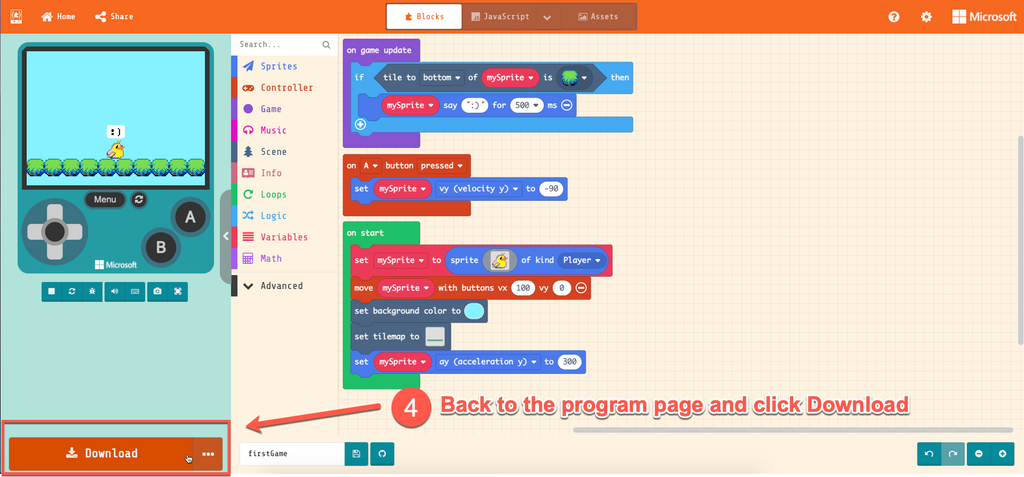
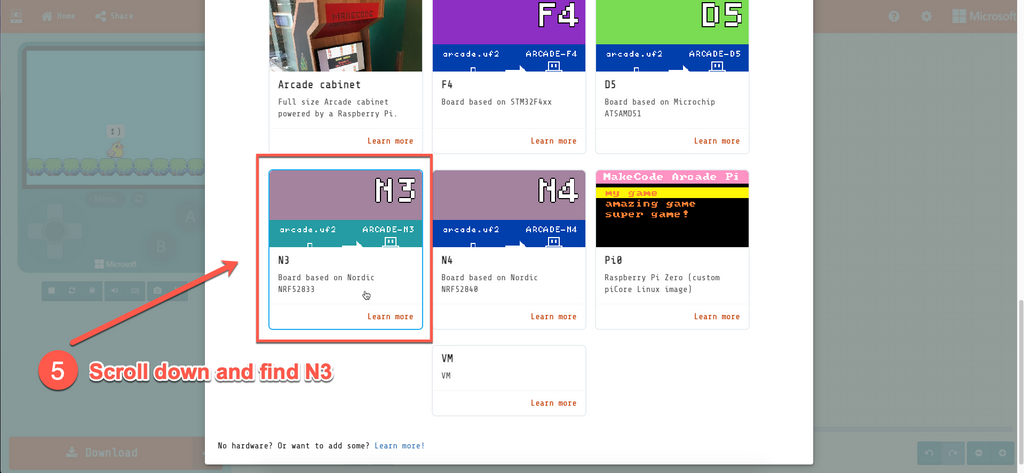
Then, let's go back to the programming page and click the Download in the bottom left corner, scroll down the pop-up windows of hardware and choose N3 at the bottom.
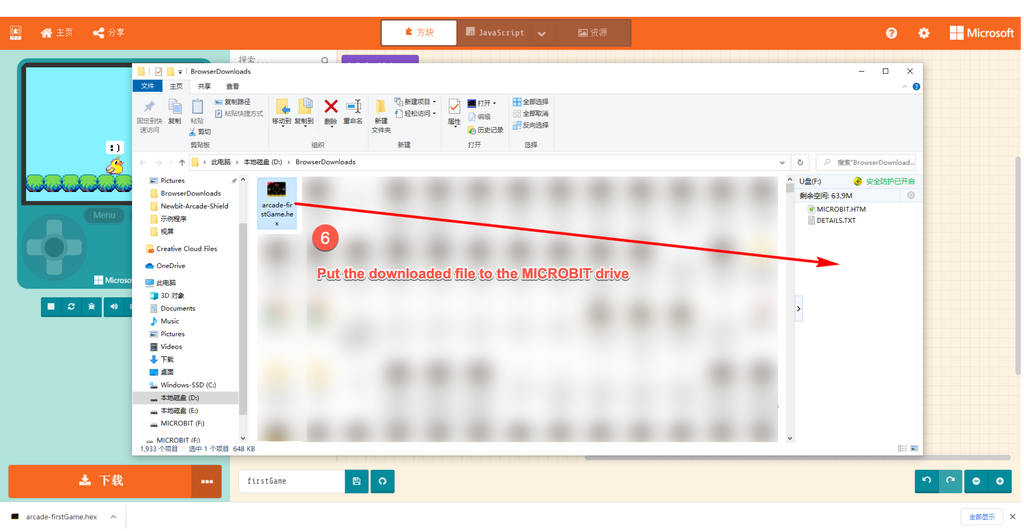
You will get a .hex file, drag it to the MICROBIT driver letter, then, you can run your game in the Micro:bit V2 + Newbit Arcade Shield.
Source file
If you have any question, please feel free to contact us at Discord, we will always be there to help.
KittenBot Team