

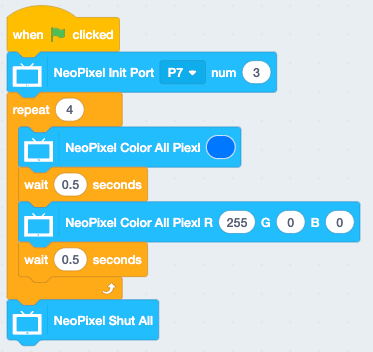
There are 3 full-color RGB ws2812 on the top of the Future board, which are connected to the P7 pin of the Future board
Programming Blocks
|
Block |
Introduction |
|
|
You must initialize before using LEDs The default P7 pin is bound to the LEDs of the Future board, the number of LEDs is 3 You can connect RGB LEDs to other pins and fill in the corresponding number of LEDs to use |
|
|
Set the color of LEDs separately (need to be refreshed to display) |
|
|
Customized color-filling of a single LED (need to be refreshed to display) |
|
|
Set the color of all LEDs |
|
|
Customized color-filling of all LEDs |
|
|
Turn off a single LED (need to be refreshed to display) |
|
|
Turn off all the LEDs |
|
|
Start the LED effect (the operation of a single LED needs to refresh to display) |


Example
📋: Control all LEDs
📋: Control a single LED

If you have any question, please feel free to contact us at Discord, we will always be there to help.
KittenBot Team